Difference between revisions of "Es:Manual Wiki para Gramps 3.4 - Ventana principal"
(→Configuration) |
(→Configuración: Link to Spanish Wikipedia instead) |
||
| Line 149: | Line 149: | ||
La vista en árbol de personas muestra a las personas agrupadas por sus apellidos. A la izquierda de cada apellido se muestra una flecha o algún otro tipo de indicador (p.ej.: ''+''). Al hacer clic una vez en el indicador se muestra la lista completa de personas con ese apellido. Al hacer clic otra verz en el indicador, la lista se "enrolla" y muestra sólo el apellido. | La vista en árbol de personas muestra a las personas agrupadas por sus apellidos. A la izquierda de cada apellido se muestra una flecha o algún otro tipo de indicador (p.ej.: ''+''). Al hacer clic una vez en el indicador se muestra la lista completa de personas con ese apellido. Al hacer clic otra verz en el indicador, la lista se "enrolla" y muestra sólo el apellido. | ||
| − | De forma predeterminada, la vista de personas en árbol muestra varias columnas de información de cada persona. Puede agregar o eliminar columnas de la presentación invocando el diálogo {{man label|Configurar la vista}} mediante el menú {{man menu|View -> Configurar la vista...}} o haciendo clic en la barra de herramientas en el botón {{man button|Configurar la vista...}} y marcando o desmarcando a continuación las casilla mostradas. También puede cambiar la posición de una columna en la vista en árbol de personas pulsando una y arrastrándola hasta una nueva posición en el diálogo de configuración de vista ([http:// | + | De forma predeterminada, la vista de personas en árbol muestra varias columnas de información de cada persona. Puede agregar o eliminar columnas de la presentación invocando el diálogo {{man label|Configurar la vista}} mediante el menú {{man menu|View -> Configurar la vista...}} o haciendo clic en la barra de herramientas en el botón {{man button|Configurar la vista...}} y marcando o desmarcando a continuación las casilla mostradas. También puede cambiar la posición de una columna en la vista en árbol de personas pulsando una y arrastrándola hasta una nueva posición en el diálogo de configuración de vista ([http://es.wikipedia.org/wiki/Arrastrar_y_soltar ''arrastrar y soltar'']). Una vez ha hecho los cambios que quiere, haga clic en {{man button|Aplicar}} para que los cambios surtan efecto y a continuación, haga clic en {{em button|Cerrar}} para cerrar el diálogo. |
{{-}} | {{-}} | ||
| − | {{man note| Configurar la vista |El diálogo de configurar la vista | + | {{man note| Configurar la vista |El diálogo de configurar la vista está disponible en todas las vistas y funciona de la misma manera en todas.}} |
=== Filters === | === Filters === | ||
Revision as of 19:25, 29 August 2012

|
Special copyright notice: All edits to this page need to be under two different copyright licenses:
These licenses allow the Gramps project to maximally use this wiki manual as free content in future Gramps versions. If you do not agree with this dual license, then do not edit this page. You may only link to other pages within the wiki which fall only under the GFDL license via external links (using the syntax: [https://www.gramps-project.org/...]), not via internal links. |
| Anterior | Índice | Siguiente |
| Idiomas: |
English • Deutsch • español • suomi • français • italiano • македонски • norsk bokmål • Nederlands • polski • português • русский • shqip • slovenčina |
Contents
- 1 Introducción
- 2 Las diferentes categorías
- 3 Cambiar de categoría o vista
- 4 Categoría Grampletes
- 5 Categoría Personas
- 6 Relationships Category
- 7 Families Category
- 8 Ancestry Category
- 9 Events Category
- 10 Sources Category
- 11 Citations Category
- 12 Places Category
- 13 Geography Category
- 14 Media Category
- 15 Repositories Category
- 16 Notes Category
Introducción
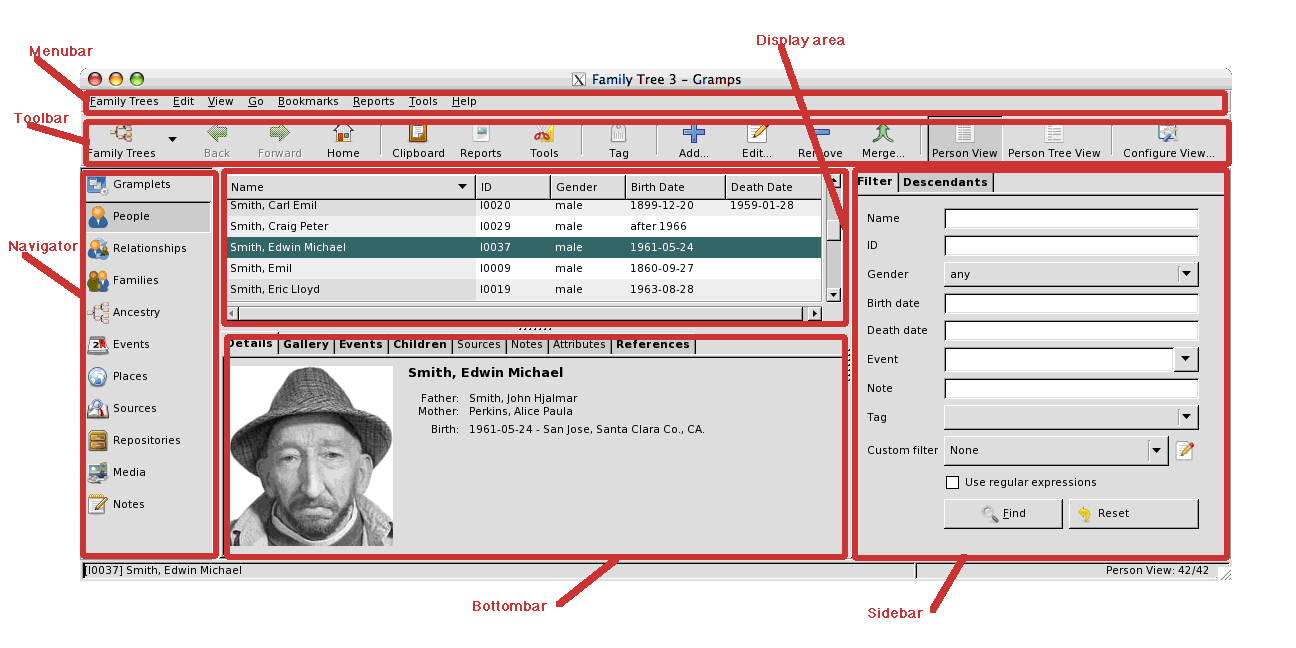
Cuando abre un árbol genealógico (bien ya existente, bien nuevo), se muestra la ventana principal de Gramps (Fig. 3.1):
La ventana principal de Gramps contiene los siguientes elementos:
- Barra de menús: La barra de menús se encuentra en lo más alto de la ventana (justo debajo del título de la ventana) y provee acceso a todas las características de Gramps.
- Barra de herramientas: La barra de herramientas se encuentra justo bajo la barra de menús. Le da acceso a las funciones más utilizadas de Gramps. Puede fijar opciones que controlan cómo aparece yendo al menú Editar->Preferencias. También puede ocultar la barra de herramientas completamente yendo al menú Ver->Barra de herramientas.
- Navegador: El navegador se encuentra a la izquierda de la ventana y permite la selección de las diferentes categorías.
- Barra de progreso y barra de estado: Se encuentran en la parte inferior de la ventana de Gramps.
- La barra de progreso se encuentra en la esquina inferior izquierda de la ventana de Gramps. Muestra el progreso de las operaciones lentas, como abrir y cerrar grandes árboles genealógicos, importar y exportar otros formatos, generar sitios web, etc. Cuando no está haciendo este tipo de operaciones, la barra de progreso no se muestra.
- La barra de estado se sitúa a la derecha de la barra de progreso. Muestra información sobre la actividad actual de Gramps e información de contexto acerca de los elementos seleccionados.
- Área de presentación: El Área en el centro de la ventana de Gramps es el área de presentación. Lo que muestra depende la vista seleccionada en cada momento. Hablaremos de las vistas más adelante..
- Barra inferior: La barra inferior se sitúa bajo el área de presentación.
- Barra lateral: La barra lateral se encuentra a la derecha del área de presentación.
| This page's factual accuracy may be compromised due to out-of-date information. Please help improve the Gramps Wiki as a useful resource by updating it. |

|
PENDIENTE ¿Es necesario actualizar este contenido, p.ej. la fig 3.1 otra vez? |
La barra inferior y la barra lateral permiten mostrar grampletes conjuntamente a una vista. (Detalles a completar a partir de, por ejemplo, GEPS 019 y Barra de Gramps, con referencias a Filtros, Filtros y a Barra lateral y barra inferior)
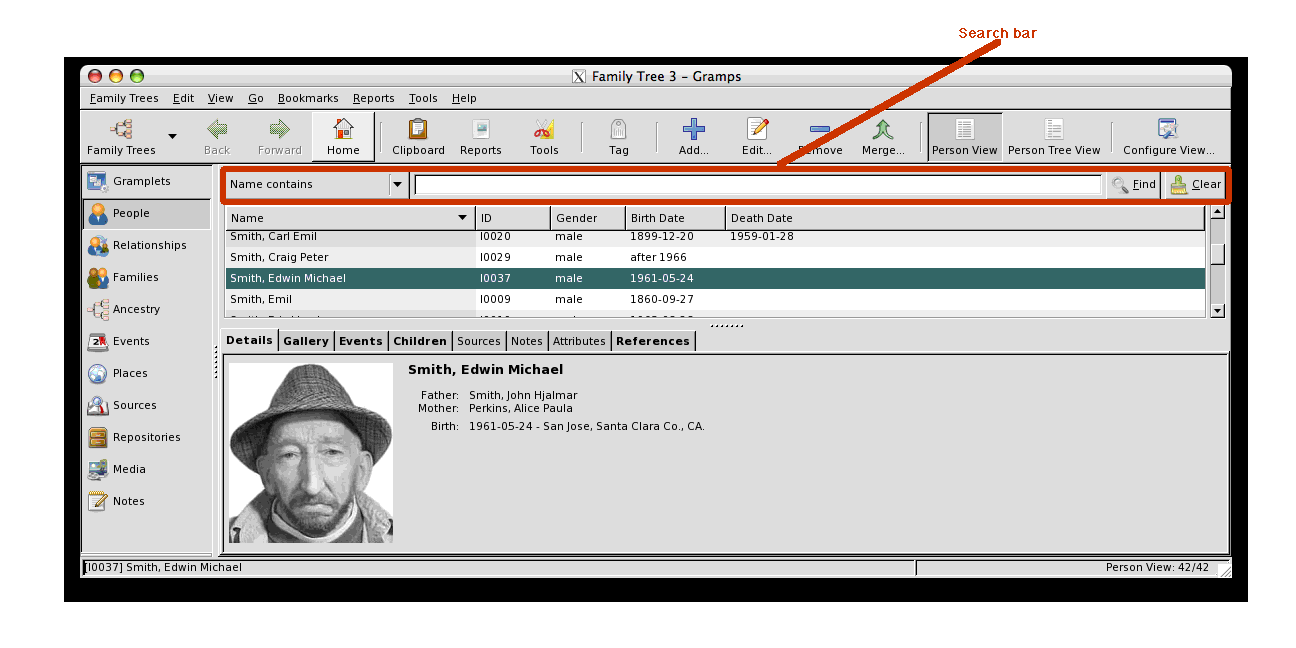
El navegador, la barra de herramientas, la barra lateral y la barra inferior se pueden ocultar o mostrar por separado mediante opciones en el menú Ver. Si la barra lateral no se muestra, se muestra la Barra de búsqueda en su lugar.
Si Gramps detecta un error menor o desea notificarle acerca de una incidencia en el programa, Gramps puede mostrar un botón de aviso, como se muestra a continuación. este botón sólo se muestra durante 180 segundos así que, si lo ve, debe hacer clic en él pronto si quiere ver los mensajes.
Si hace clic en el botón de aviso, aparecerá una caja de diálogo que mostrará hasta los últimos 20 mensajes recibidos. Más detalles
Problemas más serios causarán un diálogo de error que describirá las acciones que puede realizar.
Las diferentes categorías
La información genealógica es muy amplia y puede ser extremadamente detallada. Presentarla representa un reto que Gramps afronta dividiendo y organizando la información en una serie de Categorías, cada una con sus propias Vistas. Cada Vista muestra una porción de la información total, seleccionada según una categoría particular. Quedará más claro esto conforme exploremos las diferentes Categorías.
Las diferentes Categorías del Navegador: El navegador se encuentra a la izquierda de la ventana y permite la selección de las diferentes categorías (Vea: Fig. 3.1)
 Grampletes: Muestra distintos Grampletes, pequeños elementos que pueden ayudarle en su investigación genealógica.
 Personas: Muestra las personas del árbol genealógico sin sus conexiones. Esta categoría contiene la 'Vista de personas' y la 'Vista del personas en árbol'.
 Relaciones: Muestra en forma de texto las relaciones entre la 'persona activa' y otras personas. Incluye los padres, los cónyuges y los hijos.
 Familias: Muestra las familias del árbol genealógico.
 Ascendencia: Muestra árboles gráficos para la persona seleccionada.
 Eventos: Muestra los eventos del árbol genealógico.
 Lugares: Muestra los lugares del árbol genealógico.
 Geografía: Muestra datos de su familia en un mapa.
 Fuentes: Muestra las fuentes del árbol genealógico.
 Citas: Muestra las citas del árbol genealógico.
 Repositorios: Muestra los repositorios del árbol genealógico.
 Media: Muestra los objetos audiovisuales del árbol genealógico.
 Notes: Muestra las notas del árbol genealógico.
Las categorías pueden contener varias formas de presentar los datos. Cada forma específica se llama Vista. Antes de comenzar con la descripción de cada vista, explicaremos primero cómo moverse de una a otra vista.
Cambiar de categoría o vista
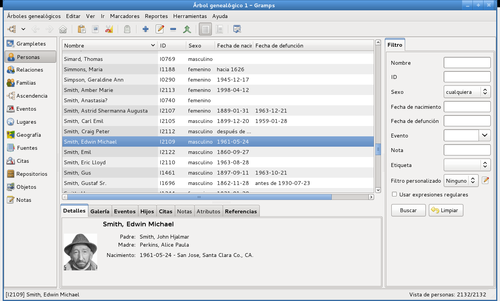
Gramps trae diversas categorías de manera estándar. Las extensiones que descargue pueden crear nuevas categorías. La pantalla principal de Gramps puede presentar varios aspectos, dependiendo de las barras que estén activadas. Un ejemplo del aspecto con todas las barras opcionales activadas puede verse en la Fig 3.2.
En particular, se muestra el navegador de categorías. Si está visible, puede seleccionar la categoría que desea haciendo clic en los iconos del mismo.
O también puede usar los atajos de teclado CTRL+P y CTRL+N para ir a las categorías anterior y siguiente, respectivamente, y CTRL+<número> para ir directamente a una categoría por su número.
Como se ha mencionado, una categoría puede contener diferentes formas de presentar los datos o Vistas. Si hay varias vistas, se puede cambiar entre las vistas mediante la barra de herramientas, pues cada vista tendrá un icono-botón diferente. También puede cambiarlas mediante el menú Ver o pulsando CTRL+ALT+<número>, donde <número> es la vista que desea ver en esta categoría.
Categoría Grampletes
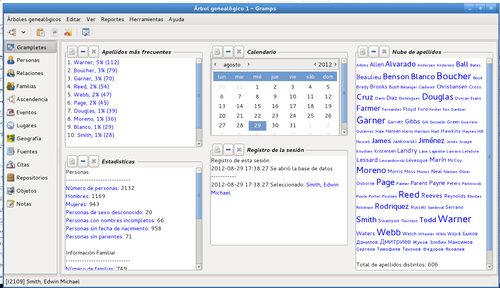
Esta categoría contiene la vista de grampletes, que muestra una serie de elementos, llamados 'Grampletes', que pueden ayudarle en su investigación. Al comenzar, se muestran dos grampletes ('Bienvenido' y 'Apellidos más frecuentes'). Haciendo clic con el botón derecho en la vista de grampletes, aparece una ventana emergente que le da la posibilidad de agregar otros grampletes:
- Edad en la fecha - ver las personas vivas y sus edades en una fecha concreta
- Estadísticas de edad - ver gráficos de edad
- Atributos - ver atributos de la persona activa
- Calendario - ver los eventos de una persona en una fecha concreta o en un mes del pasado
- Descendientes - ver los descendientes de la persona activa
- Abanico - ver los ascendientes de una persona en un diagrama de abanico circular
- Nube de nombres de pila - los nombres de pila más populares
- Ascendientes - ver la lista completa de ascendientes como texto compacto
- Vista rápida - muestra una Vista Rápida de la persona actual
- Récords - ver récords resultantes de sus datos
- Parientes - ver los parientes de la persona activa
- Registro de la sesión - llevar control de lo que ha hecho y qué registros ha visitado
- Estadísticas - ver estadísticas de la base de datos
- Nube de apellidos - los apellidos más populares como una "nube de textos"
- Tareas pendientes - una libreta en la que llevar la pista de su investigación
- Apellidos más frecuentes - los 10 apellidos más populares
- Bienvenido - un mensaje de bienvenida a Gramps
- Y ahora qué - qué hace falta hacer a continuación
Además, hay una serie de grampletes adicionales que puede instalar y utilizar fácilmente. Entre otros:
- Titulares de noticias - noticias actuales y calientes de Gramps
- Entrada de datos - editar el nombre; fecha y lugar de nacimiento; y fecha y lugar de defunción de la persona activa; así como agregar personas.
- Python - un intérprete interactivo de Python
- Preguntas frecuentes - preguntas que se hacen a menudo
- Nota - ver y editar la nota principal de la persona activa
y muchos otros. Vea Extensiones para más detalles.
Para más detalles sobre el uso de los grampletes instalados, vea Grampletes.
Categoría Personas
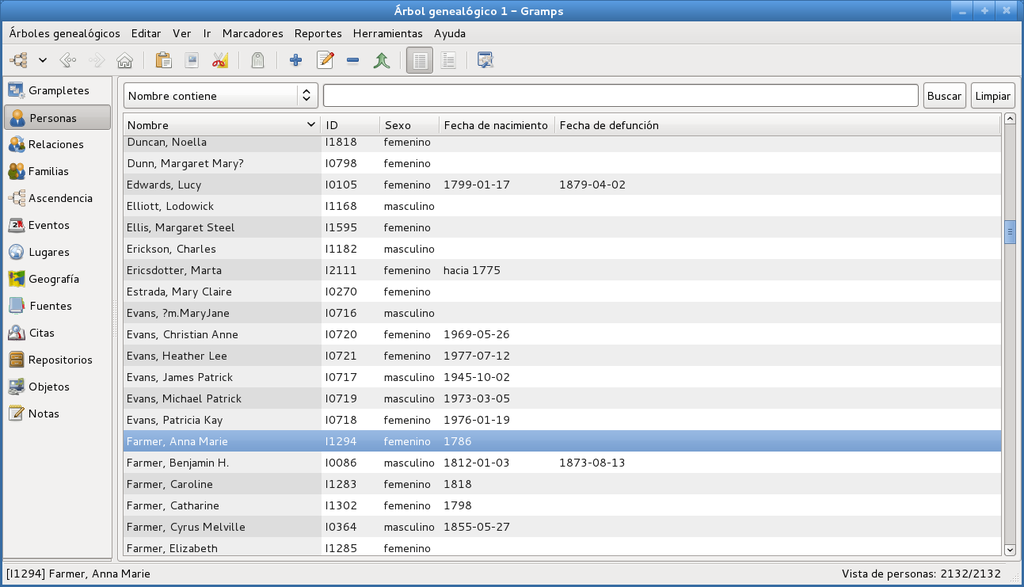
Vista de personas en árbol y en lista
Configuración
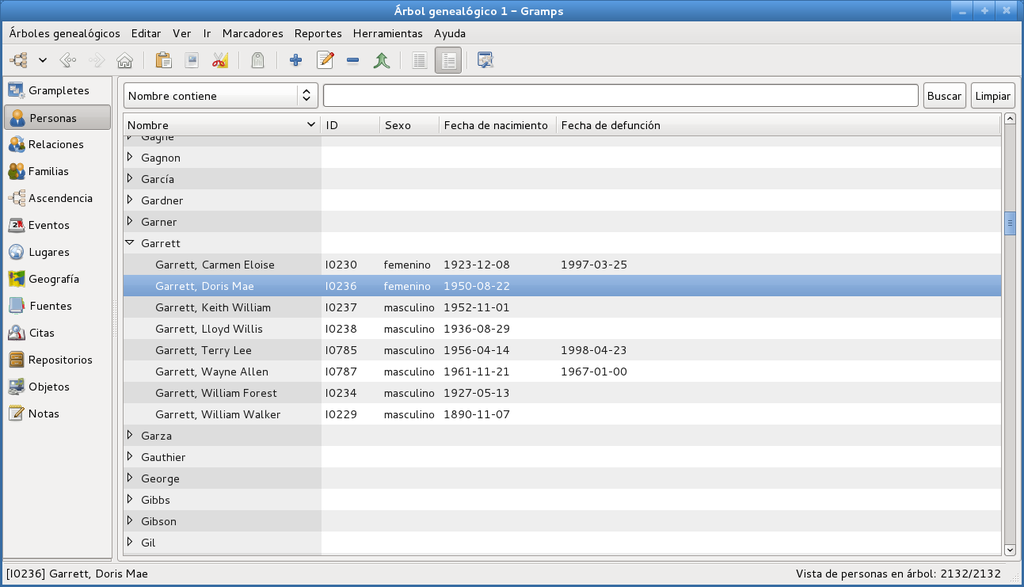
La vista en árbol de personas muestra a las personas agrupadas por sus apellidos. A la izquierda de cada apellido se muestra una flecha o algún otro tipo de indicador (p.ej.: +). Al hacer clic una vez en el indicador se muestra la lista completa de personas con ese apellido. Al hacer clic otra verz en el indicador, la lista se "enrolla" y muestra sólo el apellido.
De forma predeterminada, la vista de personas en árbol muestra varias columnas de información de cada persona. Puede agregar o eliminar columnas de la presentación invocando el diálogo Configurar la vista mediante el menú View -> Configurar la vista... o haciendo clic en la barra de herramientas en el botón Configurar la vista... y marcando o desmarcando a continuación las casilla mostradas. También puede cambiar la posición de una columna en la vista en árbol de personas pulsando una y arrastrándola hasta una nueva posición en el diálogo de configuración de vista (arrastrar y soltar). Una vez ha hecho los cambios que quiere, haga clic en Aplicar para que los cambios surtan efecto y a continuación, haga clic en Template:Em button para cerrar el diálogo.
Configurar la vista El diálogo de configurar la vista está disponible en todas las vistas y funciona de la misma manera en todas. |
Filters
Genealogical databases can contain information on many people, families, places, and objects. It is therefore possible for a View to contain a long list of data that is difficult to work with. Gramps gives you two different means for controlling this condition by allowing you to filter a list to a more manageable size.
These methods are Search and Filtering.
A search will search the text displayed in list, whereas filters display people whose data match the criteria of the filter. Search is a simple but fast method of searching the columns displayed on the screen. Typing the characters into the Search box and clicking the Find button will display only lines that match the text.
Alternatively, you can enable the Filter sidebar, which will be displayed on the right hand side of the display. When the filter sidebar is displayed, the Search bar is not displayed. The Filter side bar allows you to interactively build a set of filter rules that can be applied to the display. The filter is applied based on the rules and the data, not on the screen display.

|
Searching vs. Filtering Searching only searches for exact text matches. If the date displayed is "Jan 1, 2000", a search of "1/1/2000" will fail, but a filter of "1/1/2000" will match. |
When Gramps opens a database, no filtering is in effect. In People View, for example, all people in the database are listed by default.
Sorting columns
Clicking once sorts in ascending order, clicking again sorts in descending order. The Column Editor dialog can be used to add, remove and rearrange the displayed columns.
Relationships Category
The Relationships View displays all the relationships of the Active Person (the selected person). Specifically, it shows his or her parents, siblings, spouses, and children.
The Relationships View is designed to allow for quick navigation. You can quickly change the Active Person simply by clicking the name of any person listed on the page. Each name is actually a hypertext link, similar to a web page.
The name of the Active Person is in bold style. Other names are shown either with or without bold and italic emphasis depending on whether certain relationships exist for the named person. For a person listed as a parent or spouse of the Active Person, the name is emphasized if that person has a parent family. For a person listed as a sibling or child of the Active Person, the name is emphasized if that person has children.
Dates are normally in regular style, and in italic style if the displayed event is a fallback event, i.e., a substitute event for another missing event. That may be christening event for birth event, burial event for death event, etc.
The Relationships View displays the following sections:
- Active Person: At the top of the screen, name, ID, birth, and death information, calculated age of the Active Person is displayed. If a photo of the person is available, it is shown on the right hand side. Next to the person's name is a symbol indicating gender, and an
 Edit button. Clicking the
  Edit button will allow you to edit all of the person's individual information in an Edit Person dialog.
- Parents: The next section, the Parents section, displays the families in which the person is a child. Since it is possible for a person to have multiple sets of parents, it is possible to have several Parents sections.
You can control how much information is displayed by using the View menu. The view menu allows you to show or hide details (the birth and death information) and to show or hide siblings. Next to each person listed is an ![]() Edit button, which will allow you to edit all the details of that particular person.
Edit button, which will allow you to edit all the details of that particular person.
You may add a set of parents by either selecting the Add Parents or the Share Parents buttons. The Add Parents button will create a new family with the Active Person listed as a child. The Share Parents button will allow you to choose from a list of existing families, and then add the person as a child to that family.
You may edit an existing parents by selecting the ![]() Edit button next to the parents. If you select the - button next to a set of parents, then the Active Person will be removed as a child from the parents. This button does not delete the parents' relationship.
Edit button next to the parents. If you select the - button next to a set of parents, then the Active Person will be removed as a child from the parents. This button does not delete the parents' relationship.
- Family: Similar to the Parents section is the Family section, which displays families where the Active Person is a parent. Because it is possible to have multiple families, it is possible to have multiple Family sections. Each family section displays the spouse and any children.
You may add a family by selecting the Add Spouse button in the toolbar. This will create a new family with the Active Person listed as a father or mother.
Selecting the ![]() Edit button next to the spouse will allow you to edit the displayed family. Clicking the - button will remove the person from the displayed family.
Edit button next to the spouse will allow you to edit the displayed family. Clicking the - button will remove the person from the displayed family.

|
Removing a person from a family Removing a person from a family does not delete the family. The person is removed as the father or mother, and any other relationships in the family continue to exist. |
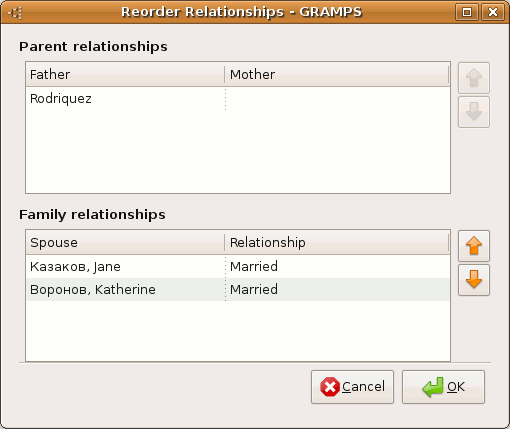
You can reorder the parents and spouses by selecting the Reorder button. This option will only be enabled if more than one set of parents or more than one set of spouses exists for the Active Person. Selecting this button will display a dialog that will allow you to reorder the families.
Configuration
You can configure the view from the display by calling up the Configure dialog from the menu View -> Configure... or click on the toolbar Configure View... button.
Families Category
The Family List View displays a list of all families in the database(see Fig. 2.9). From this view, you may add, edit, or delete families. The default display lists the ID, Father, Mother, Relationship and Marriage Date. Children cannot be displayed on the screen in this view.
Ancestry Category
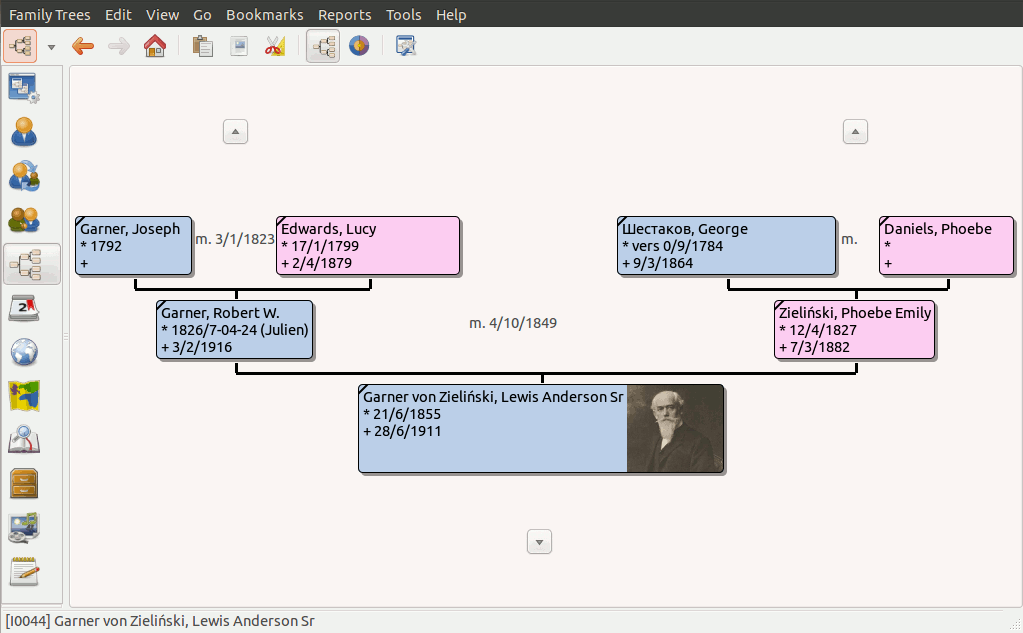
The Ancestry Category shows several graphical representations of the ancestry of the active person. By default Gramps shows the Pedigree View; With the Fan Chart View being selectable from the toolbar. Installation of additional downloadable addons contain extra views.
Pedigree View
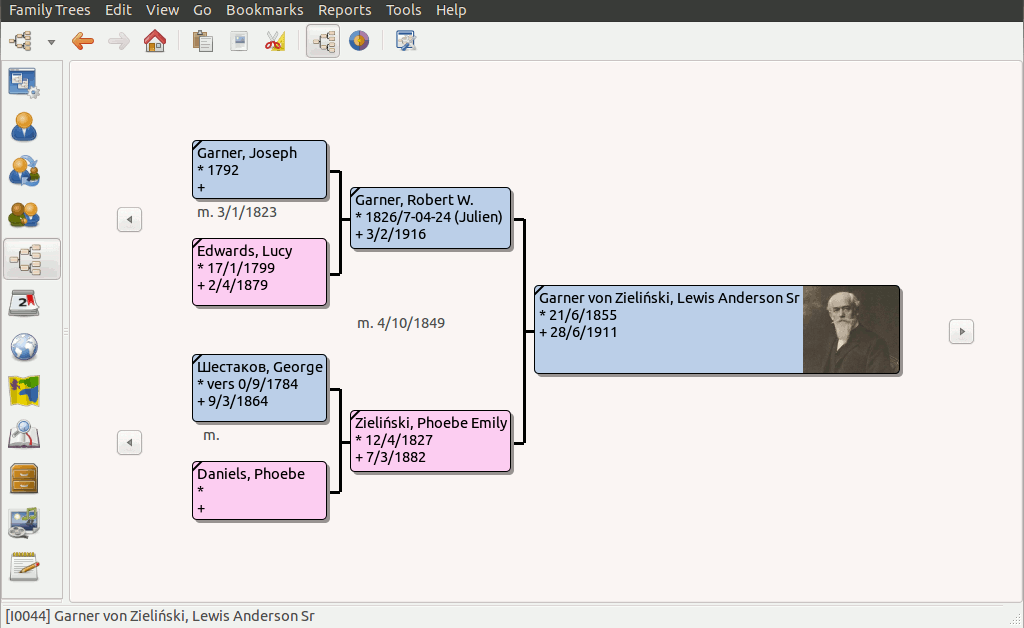
The Pedigree View shows up to five generations, depending on the size of the window. Each person is indicated by a box labeled with his or her name, birth and death information, and optionally an image if available. Two lines branch from each box. The top one shows the person's father and the bottom one the mother. Solid lines represent birth relations, while dashed lines represent non-birth relations such as adoption, step-parenthood, guardianship, etc.
To the left of the Active Person is a left arrow button. If the Active Person has children, clicking this button expands a list of the Active Person's children. Selecting one of the children makes that child the Active Person.
The appearance of the children's names in the menu differentiates the dead ends of the tree from the continuing branches.
Children who have children themselves appear in the menu in the boldface and italic type, while children without children (dead ends) appear in a regular font. If the Active Person has only one child, no menu will be displayed (since there is only one choice) and the child will become the Active Person when the arrow button is clicked.
The right-hand side of the window shows two right arrow buttons. When the top button is clicked, the Father of the Active Person becomes the Active Person. When the bottom button is clicked, the Mother of the Active Person becomes the Active Person.
Right-clicking on any person's box in the Pedigree View will bring up the "context menu".
Among other useful items, the context menu has sub-menus listing Spouses , Siblings , Children , and Parents of that person.
"Greyed-out" sub-menus indicate the absence of the data in the appropriate category. Similar to the children menu above, Childrens' and Parents' menus distinguish continuing lines from dead ends.
Fan Chart View
This view shows the ancestry but as a pie chart. Clicking on a name in the chart will double the section of the pie allocated to that person. A second click brings the chart back to the original form. Right click brings up a context menu like in the pedigree view, allowing to navigate to other people.
This view enables to see large ancestries in a more compact manner, and to see very quickly which parts of an ancestry need further research.
You can rotate the view by click and drag outside the fan chart. You can move the view by click and drag inside the inner (white) region.
Events Category
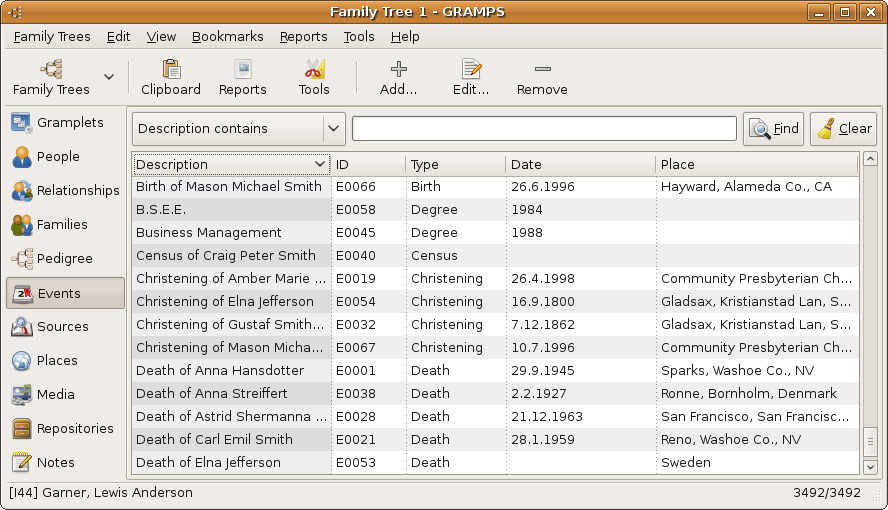
Events can be shared between multiple people and multiple families. The Events View lists the all the events recorded in the database.
The columns available for display are: Description , ID , Type , Main Participants , Date , Place and Last Changed.
The default view displays the Description , ID , Type , Date and Place of the event. The Column Editor dialog can be used to add, remove and rearrange the displayed columns. This can be accessed from the Configure View... button on the toolbar.
The list of Events can be sorted in the usual manner, by clicking on the column heading. Clicking once sorts in ascending order, clicking again sorts in descending order.
Sources Category
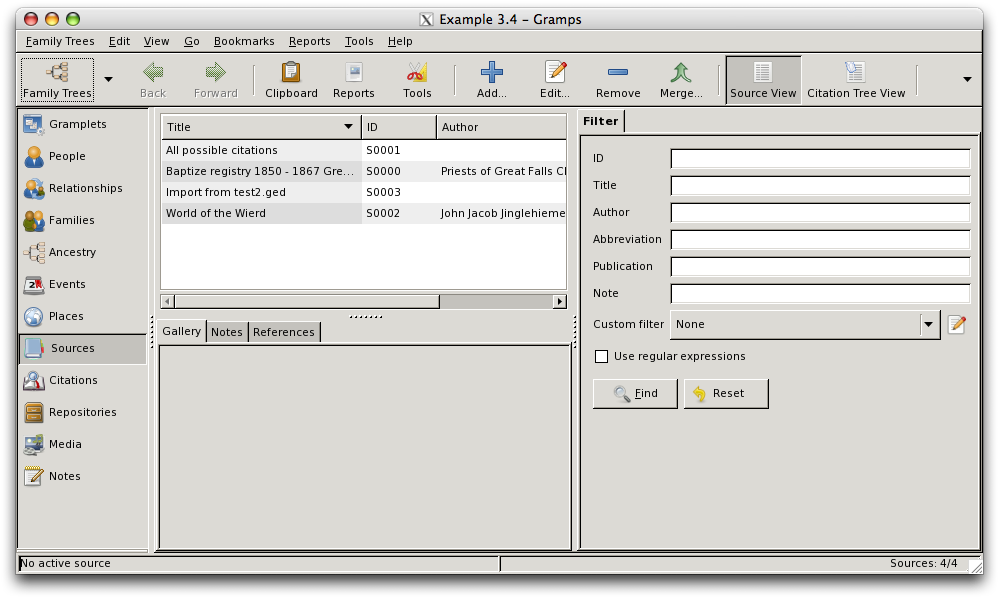
Sources View lists the sources of certain information stored in the database.
There are two views in this category. The default (Citation Tree View) shows all the sources, and for each it allows the user to see the Citations associated with that source by clicking on the disclosure triangle. The alternative view only shows the Sources.
Sources can include various documents (birth, death, and marriage certificates, etc.), books, films, journals, private diaries, - nearly anything that can provide genealogical evidence. Gramps gives you the option to provide a citation to a source for each event you record (births, deaths, marriages, etc.). The Sources View lists the Title , ID , and Author of the source, as well as any Publication information that may be associated with it.
The list of Sources can be sorted by clicking on a column heading.
Clicking once sorts in ascending order, clicking again sorts in descending order. The Column Editor dialog can be used to add, remove and rearrange the displayed columns.
Citations Category
Citation View lists the citations for certain information stored in the database.
Citations specify which parts of a source are relevant to the information in the database. For example, a Source may be a book, and the citation may be a particular page in the book. Gramps gives you the option to provide a citation for each event you record (births, deaths, marriages, etc.). The Citations View lists the Volume/Page , ID , and Date of the citation, as well as any Confidence in the evidence.
The list of Citations can be sorted by clicking on a column heading.
Clicking once sorts in ascending order, clicking again sorts in descending order. The Column Editor dialog can be used to add, remove and rearrange the displayed columns.
Places Category
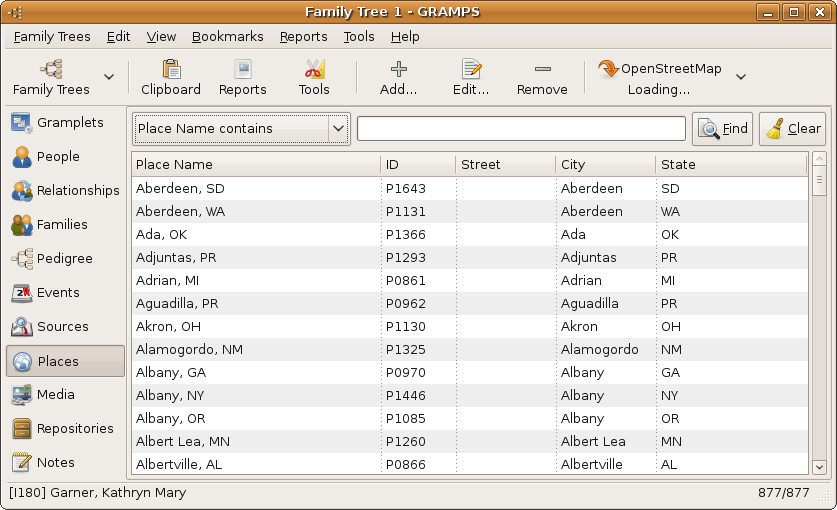
The Places Views lists the geographical places in which the events of the database took place. These could be places of birth, death, and marriages of people, as well as their home, employment, education addresses, or any other conceivable reference to the geographical location. The Places View lists the places' Name , ID , Church Parish , City , County , State , and Country . All of these columns can be used for sorting by clicking on a column heading.
Clicking once sorts in ascending order, clicking again sorts in descending order. The Column Editor dialog may be used to add, remove and rearrange the displayed columns.
If a place has been highlighted, you may select the Google Maps, loading... button to attempt to display the place in a web browser. The map service can be chosen from the drop down list under the black triangle to the right of the map button.
Your default web browser should open, attempting to use either the longitude and latitude coordinates or the place name to display the location using the Google Maps web site. Different map services might have different requirements for the location description.
This feature is limited, and may not always produce the results you desire.
PlaceTreeView and PlaceListView
The two views in this category show the places grouped or ungrouped. The PlaceTreeView tries to group the places in logical groups: country, county, ... .
This view is new in Gramps version 3.4.0. (In future versions the aim is to make the grouping more intelligent. ???)
The PlaceListView on the other hand just shows all the places in one long list.
Geography Category

|
Note The Geography category is only present if OsmGpsMap is present that Gramps can use. |
This category is for showing data on a map. It contains the Geographic View, which allows you to see the people and their events placed on a map via an internet map provider (OpenStreetMap or Google maps).
The Geographic View can:
- show all places in your family tree
- show a filtered selection of places
- show all places connected to the active person
- show all places connected to the active family
- show all places connected to all events
- show all places connected to a filtered selection of events
These options are accessible via the buttons on the toolbar. To filter on places or events, activate the filter sidebar via the menu View->Filter Sidebar
Furthermore, the Geographic view can help you add new places to your family tree, or add latitude-longitude coordinates to existing places. To activate this, use the add location button, or the link location button in the toolbar.
The top of the Geographic View shows two lines with information, allowing you to change the information shown. The second line always shows in bold what is shown on the map.
The first line has:
- Place list button and selection field.
- The button shows how many places are present in the map. The selection fields allows you to jump to one of these places. You can clear the selection field by clicking the places list button.
- Place page buttons
- If there are many places, the map is no longer useful because too much information is shown. Therefore, the places will be divided in pages. You can navigate the pages and see the map change via the Place page buttons: << goes back a page, >> goes forward a page, and the middle button shows how many pages there are and what is shown at the moment.
- Places with no latitude-longitude
- The Geographic View can only show places with a valid latitude-longitude. A list of all places that satisfy the selection, but cannot be put on the map, is available via the button with a number and the ? sign. You can add latitude-longitude to these places in one of the following ways:
- Use the place link button on the Geographic View
- Go to the Place View, and use the Go button to search the place and it's location
- Download the Place completion tool via the menu Help->Plugin Manager. If you download the data of your country, this tool can add latitude-longitude to all your places.
- lock zoom level.
- If you zoom the map to a resolution you want to keep, then you can press the lock zoom level button, and every time the Geographic View redraws the map, this zoomlevel will be used.
- provider selection change
- Gramps uses OpenStreetMap or Google Maps to provide the map that is displayed. With this button you can quickly change from one to the other. The advantage of OpenStreetMap is that it is a free project, so you can update the maps yourself with missing information via their website.
Via the toolbar Configure View... button (or via the menu View, the following functionality is available:
- Map options
- add crosshair in center of map, usefull to add or link places to the correct latitude-longitude coordinates
- show coordinates in the statusbar
- Time period: this changes how the view divides events in groups
- Network: This view needs an internet connection. If your connection drops away from time to time, or is not always on, you can set here to have the Geographic view retry the internet connection. Like this, the Geographic view will become active the moment your internet connection returns, without you needing to take manual action.
Media Category
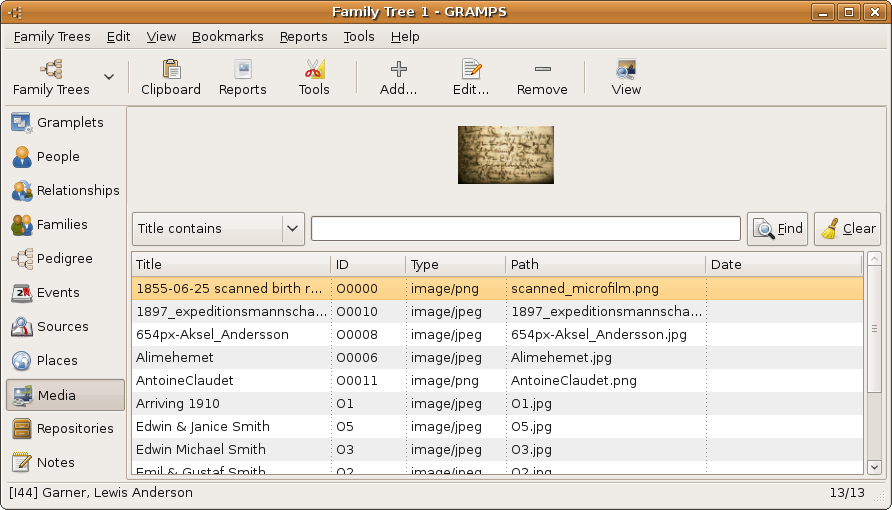
The Media View is a list of Media Objects used in the database.
Media Objects are any files that relate somehow to the stored genealogical data.
Technically, any file can be stored as a Media Object.
Most frequently, these are images, audio files, animation files, etc. The list box on the bottom lists the Name , ID , Type , and Path of the Media Object.
The Column Editor dialog may be used to rearrange the displayed columns, which obey usual sorting rules. The top part of the Gramps window shows a preview (if available) and information about the Media Object.
Repositories Category
A repository can be thought of as a collection of sources.
Each source in the database can reference a repository (such as a library) in which it belongs. The functionality of the Repositories View is similar to the other views.
Notes Category
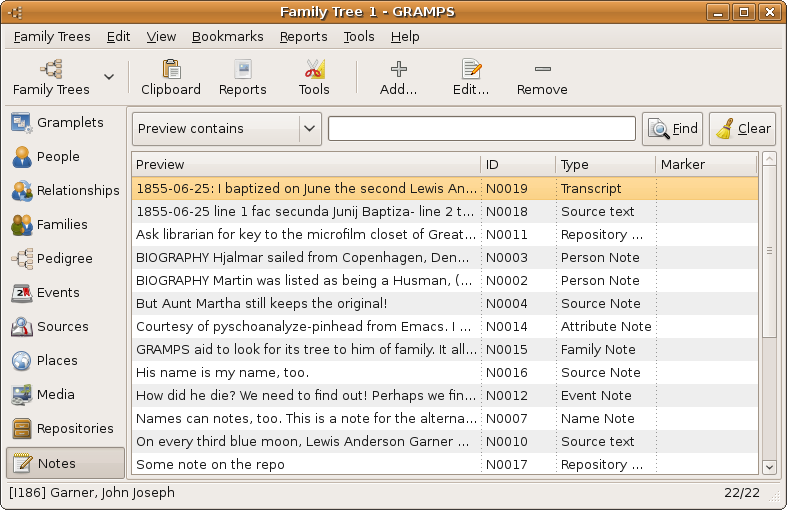
A Note is pure text, as stored in the other objects.
The functionality of the notes View is similar to the other views. The view lists all Notes stored in the Family Tree. Using the menu View ->Configure View... you open the Column Editor and you can change the displayed columns. The possibilities are Preview, ID, Type and Marker.
The Type can be (amongst others): Event Note, Address Note,Source text, Place Note
Double-clicking on a Note in the list will bring up a window where you can edit the Note. You can change fonts, font color and background color. A spellchecker is available for English and your local language.
| Anterior | Índice | Siguiente |
| Idiomas: |
English • Deutsch • español • suomi • français • italiano • македонски • norsk bokmål • Nederlands • polski • português • русский • shqip • slovenčina |
